Organizing Festival Screenings with Scrivener
Figuring out what to see at a film festival as jam-packed as SXSW1 is a dark art I am yet to master. This year’s programmers have slated 132 feature films. If each one is 90 minutes (a fair average) it would take over eight days to watch them all around the clock. I’m only there for six…and I sleep. At any fest, you’re going to miss a large chunk of the films on offer. This year, I’m using Scrivener to help prioritize which films I’ll add to my schedule.
[If you’d like to just dive in, you can skip ahead to the downloads section and grab the files I’m describing in this article.]
I’ve written before about how Scrivener is no longer my go-to writing app, but it still holds an important place in my workflow. Originally created to help tame the disparate strands of a novel writer’s mind, the app has grown into a veritable Swiss Army knife of textual tools. I use it all the time to convert Word .docx documents to Markdown formatting, and it is the best transcription app available on the Mac. When I have a really out of control piece of writing Scrivener can break my nonsense up into sections so I can see a sort of exploded view of my thoughts. That’s what it feels like when scheduling festival coverage; the abundance of great work can be overwhelming.
The good news is that SXSW’s Web site is one of the most comprehensive as far as film festivals go. It makes it extremely easy to organize screenings by day, venue, title and screening series. However, in order for my mind to wrap itself around the festival calendar, I need to first familiarize myself with the films. And for that, the Web site leaves a bit to be desired, at least in the first phase of “which films do I want to learn more about?”
I used the handy press releases that the fest sent out and rolled my own little system. First I copied and pasted the films and series into OmniOutliner and cleaned them up a bit so that each film’s description was a “note.”2 Then I exported that as an OPML file, which I imported (using “Import and Split”) into Scrivener.
Why go to all the trouble? I’ll show you:
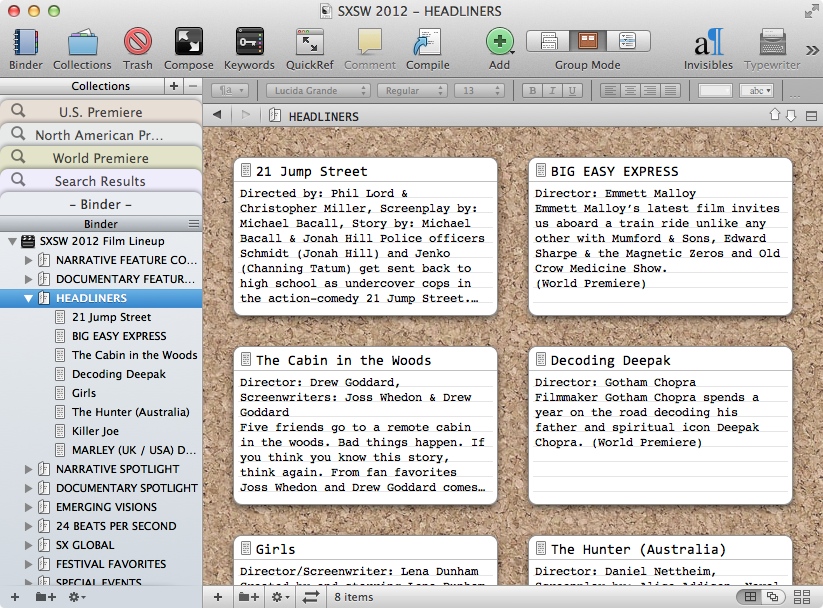
If you’ve never seen a Scrivener project before, I can bring you up to speed. On the left side of the window is the Binder which is basically where your documents live. Think of the film series (HEADLINERS, NARRATIVE SPOTLIGHT, etc.) in the Binder as folders and the films themselves (21 Jump Street, BIG EASY EXPRESS, etc.) as documents.
In the main section of the window you’ll see note cards on a cork board. Those are all of the films in the selected series. Since I set the films’ descriptions as notes in OmniOutliner before creating the OPML file, Scrivener automatically fills in the “synopsis” on each card. Now we have that exploded view of the films that I was looking for. All of the films and their short descriptions are organized on cards that I can sort and annotate. But we’re just getting started.
Scrivener has a very powerful (and fast) search function. Even better, you can save any search as a “Collection”; any document that matches your search criteria will be added to a tab in the Collections area above the Binder. Since SXSW’s press materials note whether or not the film is a World, North American or US premiere, I built collections to search for exactly those words. You can build your own collections to be as specific as you like. The notes for the films also include country of origin, so you could create a search collection for “Ireland,” for example, and see what films pop up. You could even type in keywords like “comedy” or “horror.” You can really hone in on anything you like, as long as that information is in the film’s title or description.
Finally, you actually have to make some decisions about which films you are going to see. Scrivener has tools that can help there too. Let’s turn on the Inspector panel.
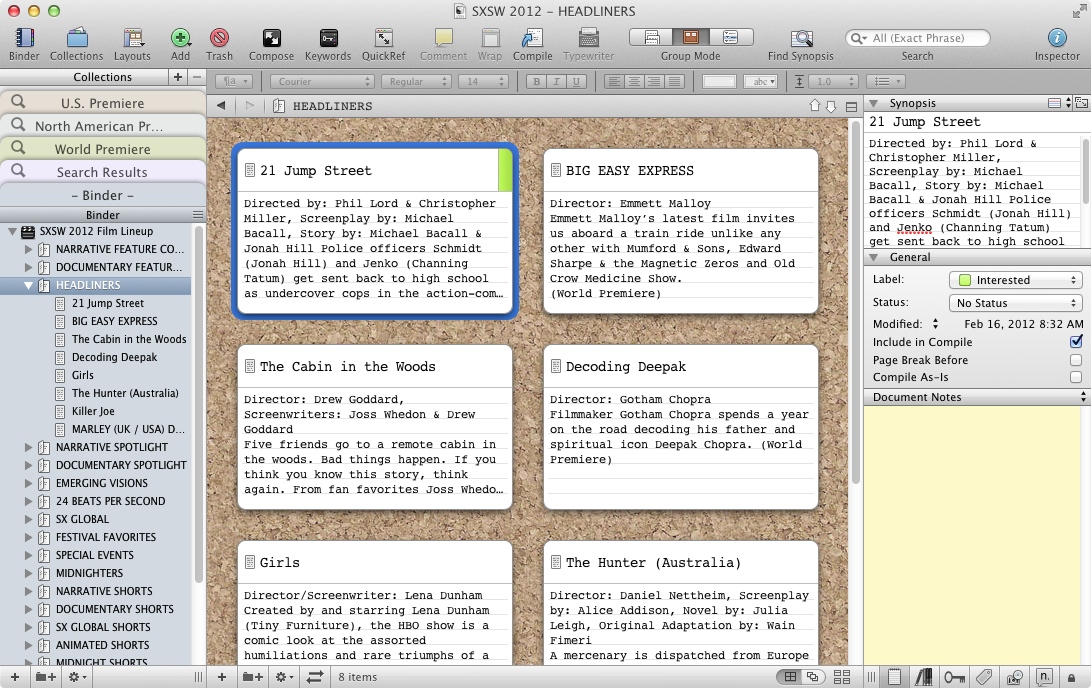
In the Inspector on the right, a slew of document options pop up. Remember, each film is actually a document. I’ve made custom labels for to determine my interest level in a film. When I add a label to a film, the right-hand corner of the card will change color. Now I can start to piece together how many films in each series I’d like to see. Additionally, I can add notes on each film. Those notes and labels are also searchable, so I can further create collections of the films I’m interested in. Now, finally, I can go to the calendar listings on the SXSW Web site and begin to piece together my schedule with a more informed outlook.
The idea here isn’t to set aside the films I have no interest in seeing. Part of what makes a festival experience enjoyable (and desirable) is the sense of chance that comes along with dropping yourself into an unfamiliar town. I have been happily surprised by many films that were nowhere on my radar before a festival. In fact I’ve accidentally walked into some of my favorite films. Still, landing in Austin without a plan has been my modus operandi for two years running. This year, I’d like to at least try to plan out what I want to see beforehand. Scrivener makes that a lot easier to do.
Downloads
If you purchase any of the apps listed in this article with the following links, you will be supporiting the candler blog. I greatly appreciate it.